There are always several important things you have to consider before you start to paint your miniature (at least that’s how I see things). The first and most important is a general idea on how you want the model to look like (colorscheme, background, etc.) Before I pick a miniature I always check some versions painted by other painters, the miniature background, ‘codex’ colorscheme, to know where’s my starting point, etc. There are usually some great works on the web of the same or similar models done by many masters of the brush! I try to develop my own vision of the mini, something which is at least a bit different and original, something that would get me inspired. After I get a general idea I start to search the web some more.
Now comes the time to gather the references. I always try to gather and extensive range of different references for most parts of the miniature (it could come from movie wallpapers, artistic photography, drawings and paintings, really anything) For instance, when looking for references for some high-tech armor surfaces I like to search for high quality pictures and designs of cars.
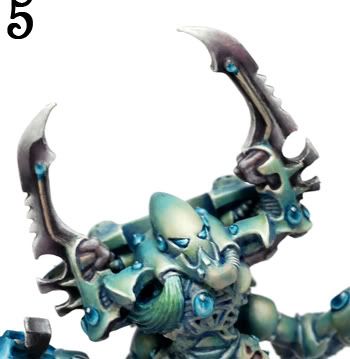
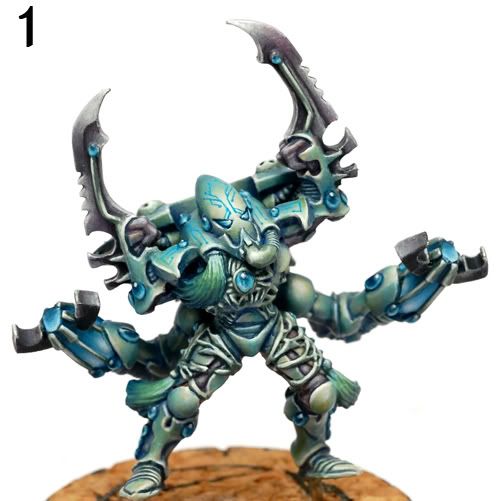
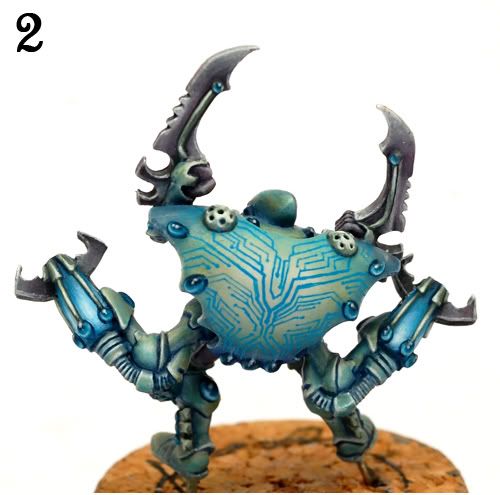
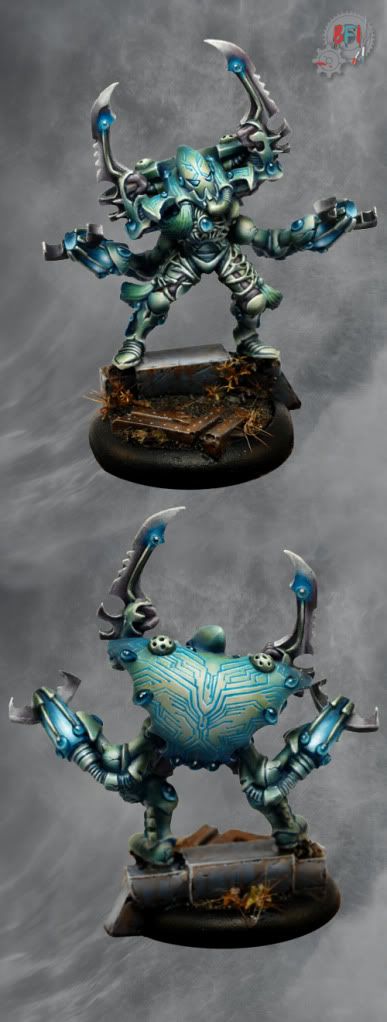
It had been in that stage that I came with the idea of incorporating some Tron imagery to the previously chosen colorscheme!
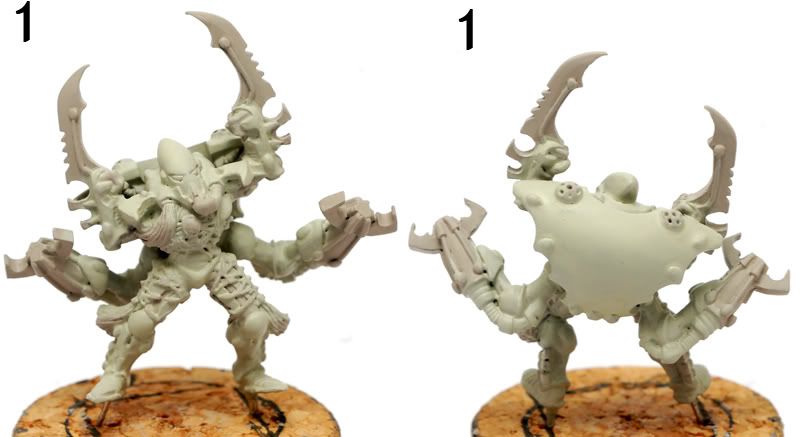
After the references have been gathered I prepare the miniature itself (sanding, polishing, removing mouldlines). An important thing is to pin the miniature if it consists of several elements. Also pinning the miniature to the base makes it much more unlikely to suddenly fall of the base!
The last thing I do before getting down to paint is to list the colors I will use for different parts. I write them down in sections in my notebook. I find this very helpful when I need to go back to some surface after some time. There is no need to rediscover the color by mixing, I simply know rigth away how to achieve it!
2.) Painting the miniature
Enough of the introduction, I need to finally start the painting!
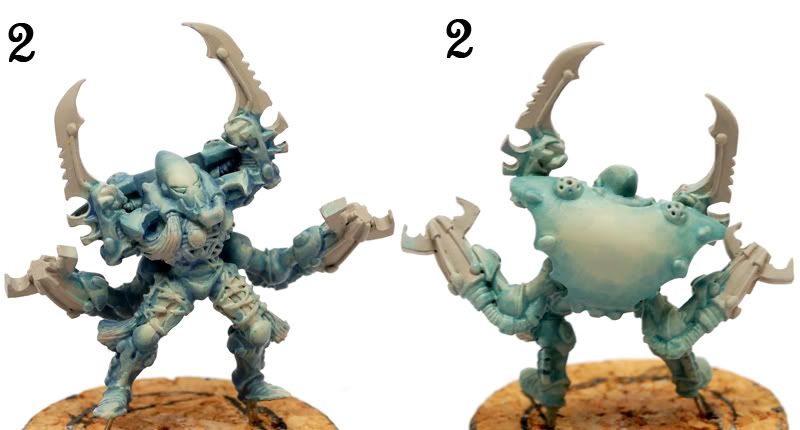
I start from basecoating the entire miniature by a Citadel Foundation paint. It is IMO the best baint for basecoating as it is the most adhesive acrylic/vinyl paint there is! I generally prefer light basecoats, I use dark basecoats only under metallic paints!
1. Painting main armor
Because I wanted the armor to be light and cold in tones in the same time, I decided to use White paints for basecoating, and then shade it with the addition of cold colors. For painting white I used Andrea White Paint Set (if you’re not familiar with it it’s a set of 6 different shades of white: one basecoat, two shadows and three highlights). It is IMO an excellent set, really makes painting nicely looking white such a pleasent process! It is somewhat warm in hue, so I decided it will make a nice contrast to the cold shadows.
Basecoat: Andrea White Paint Set (AWPS) base color
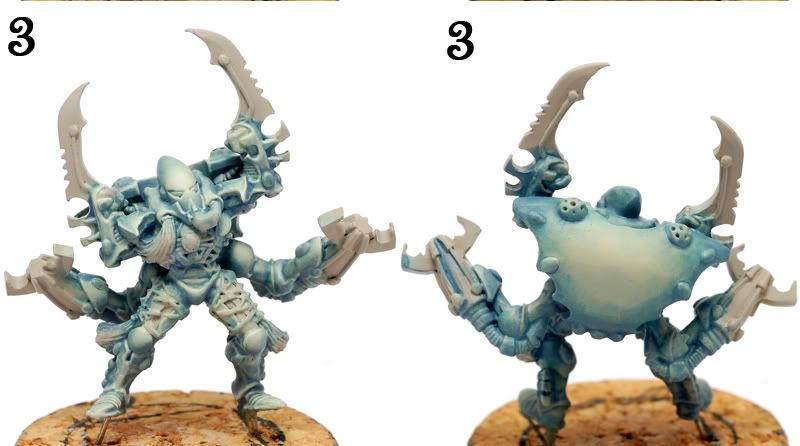
Time for applying some shadows!
First Shadows: basecoat + AWPS 1st shadow + Ice Blue (GW) + Hawk Turquise (40/40/10/10)
*(40/40/10/10) the percentage addittion of paints in the mixture, 40/40 is 40% of basecoat and 40% of 1st shadow
Second Shadows: First Shadows + AWPS 2nd shadow + Ultramarines Blue (40/50/10)
Third Shadows: Second Shadows + Lich Purple + Regal Blue (80/10/10)
I apply the shadows with the mixture of paint and water (about 50/50). There is no need to be very precise in the process. I just apply the paint in the general areas when the shadows should be (any stains will be later removed during rehiglighting process). I get more precise however when applying deeper shadows.
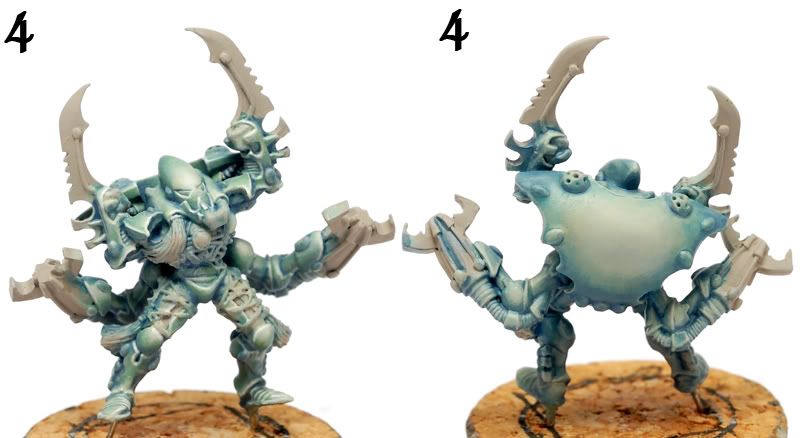
Time for rehiglighting!
First Highlights: basecoat + AWPS 1st highlight (50/50)
Second Higlights: First Highlights + AWPS 2nd highlight (50/50)
Third Highlights: Second Highlights + AWPS 3rd highlight (50/50)
In this process I try to be more precise than with the shadows. The dilution of the mixture is similar (50/50). However there is no need to worry to much about some not-so-smooth transitions between lights and shadows, it will be all corrected during the glazing/midtones process. Third Highlights are applied to the most lighted areas and edges.
Now the most important process of working on the midtones begins!
I always pay as much attetnion as possible to this process. For this purpose I will use glazes (highly dilluted mixture of paints but applied in a controlled-blending way in small areas, unlike the washes). To use glazes correctly requires much practise as it is a difficult technique, but if used properly it will make your miniature perfectly balanced in hues and tones, and it will make your blendings very smooth! I create my glazing by adding some colors (mostly vivid/strong ones) to the basecoat/shadows/highlights and dilluting it with water (about 20/80 paint/water or even more). I used the following glazes:
· Basecoat + Dark Yellow (Vallejo Model Color)
· Basecoat + Graveyard Earth
· Basecoat + Hawk Turquise
· First Shadows + Regal Blue + Scales Green
· Third Shadows + Ultramarines Blue + Lich Purple
· First Shadows + Ironhull Grey (P3 Formula)
After the glazes had been applied I rehiglighted the edges using dilluted pure White
2. Painting other surfaces and details
Note: The techniques I explained while painting the armor applies to the entire miniature, therefore I will now make shortcuts in explaining, focussing on colors used, unless there are some different techniques (in which case I will explain them ^^)
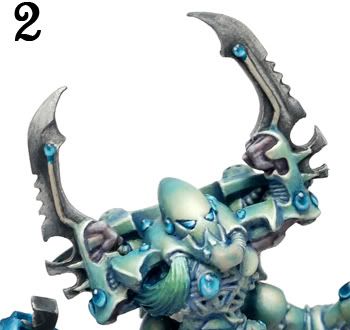
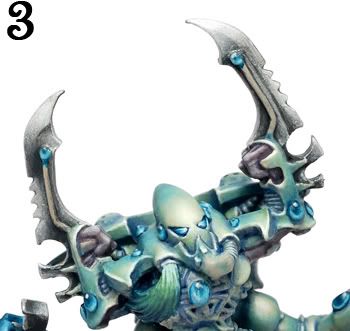
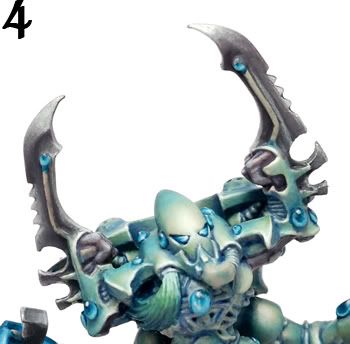
Gems and the glowing weapons have been painted using the same colors. I wanted them to be a bit more pure bluish to contrast the somewhat greenish and dirty armor. The technique was simply a work on shadows and highlights with only a bit of glazing, due to the small size of the objects (glazing is mainly a work for wide, flat surfaces).
I used Enchanted blue/Ice Blue mix for a start. Than it was shaded by adding Regal Blue and finally Chaos Black. For the highlights I added Space Wolves Grey and Skull White
The pants/gloves had been painted with a basecoat of Faded Purple (Reaper Master Series), shadowed by a mixture of Ultramarines Blue and Dusky Grape (Reaper MS), and then highlighted by adding Space Wolves Grey to the basecoat.
The plumes/pom-poms, or whatever those things are, had been painted using the same colors as the armor. In addition, during the glazing/midtones process they had been shaded by a mix of Hawk Turquise/Dark Yellow (Vallejo MC), to give them a more greenish nuances for the means of contrast.
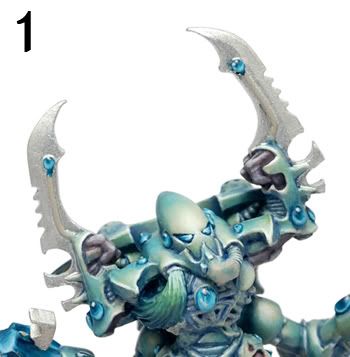
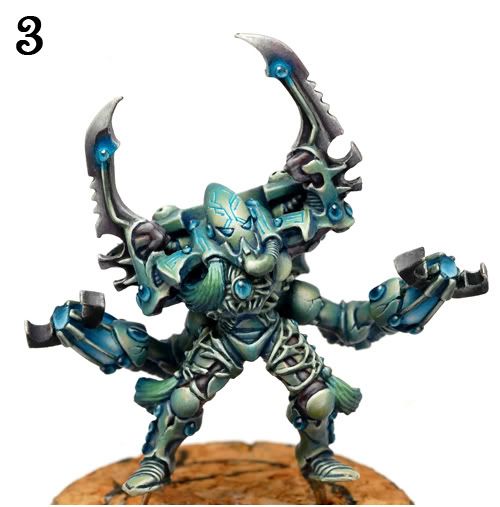
Now the time had come to paint the blades. I decided to paint them using my metallic techniques, simply to show you how I do that.
When painting silver/steel metallics, I always start by basecoating the area with Liquid Silver paint. It is a special paint from Vallejo, on an alcohol base, very brilliant, very fast drying and extremely adhesive. It makes it an ideal paint for basecoating metallics. It requires only one thin layer to cover the entire area!
After the blades had been basecoated, they need to be shaded. My technique of shading metallics is rather quite different from what you might normally find painters doing. Instead of using inks or acrylics I use pigments. However, to properly use pigments for that purpose, you need to use it with a specific medium, otherwise it won’t stay on the surface and will be removed with the slightest stroke of a brush!
I used a mixture of: grey and black pigments + Matt Varnish (Vallejo MC) + White Glaze (Vallejo MC) + water
I added a bit of Matt Varnish, mixed it with gray pigment and water and than added a bit of White Glaze, which is a special, semi transparent type of paint, much weaker than standard white. When added to a mix, it provides great smoothness. Matt Varnish on the other hands makes the mixture very durable and difficult to remove by accident.
I applied several following coats, adding more black pigment to the deeper shadows.
After that was done I rehighlighted the blades using a mix of Mithril Silver and White Glaze.
I mixed some White Glaze with grey pigment and dilluted the mixture to use as a glaze to work on the smoothness of the blending (the same as with the armor). For the highlights I used pure White Glaze to make the metallics more smooth and matt.
After that I prepered other glazes, this time with vivid acrylic colors. I used: Regal Blue and Lich Purple to work on the shadows. Finally I added some pure Chaos Black to reinforce the deepest shadows. Having that done I moved to highlights and with a mix of Mithril Silver and White Glaze rehighlighted the edges.
The miniature is almost finished, only freehands remained now.
I painted the freehands with my finest brush using a mix of Ice Blue and Hawk Turquise.
It had been partly redrew, partly invented on the miniature from a reference picture on my computer.
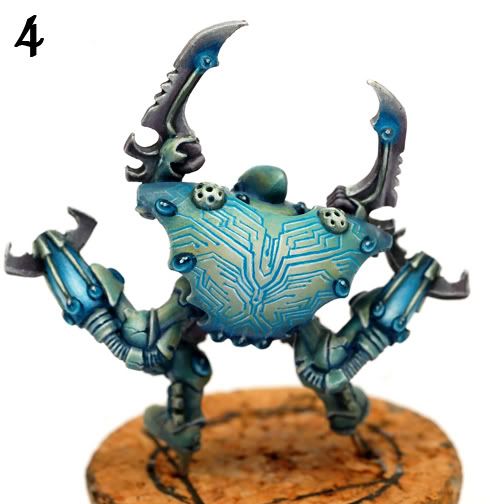
The blue lines had been underlined by a thinner white line to give the freehand a more dimensional impression. I decided not to make the freehand glowing, which I had been planning at the beginning, bacause I relised that the similar blue tones of the miniature would make it less visible and eye-catching. As a last addition I made the glow on the gems on the blades to make them stand out more with a delicate coat of Enchanted Blue, and then stronger of Ice Blue right around the gems.


1 komentarze:
Skrit: awesome tutorial!
Post a Comment